
Introduction
Integrating Ezoic via the WordPress plugin using the JavaScript method is the most efficient way to access Ezoic’s optimization tools. This method automatically inserts high-performing ad placeholders across your site based on proven default configurations. While the system typically learns and optimizes within 2–3 weeks, you can also manually refine your placements to ensure they align with your site’s specific layout.
Instructions
Note: This article is specifically for WordPress users. If you are not using WordPress, please follow the Manual JavaScript Integration Guide.
Step 1: Install or Update the Ezoic Plugin
-
In your WordPress dashboard, navigate to Plugins > Add New.
-
Search for "Ezoic".
-
Click Install and then Activate.
-
If you already have the plugin, ensure it is updated to the latest version to access the newest integration features.
Step 2: Enable JavaScript Integration
-
Navigate to Settings > Ezoic and select either the Dashboard or Integration tab.
-
Click "Enable JavaScript Integration".
-
This action injects Ezoic’s required scripts into your site’s header automatically. No manual code editing or DNS changes are required.
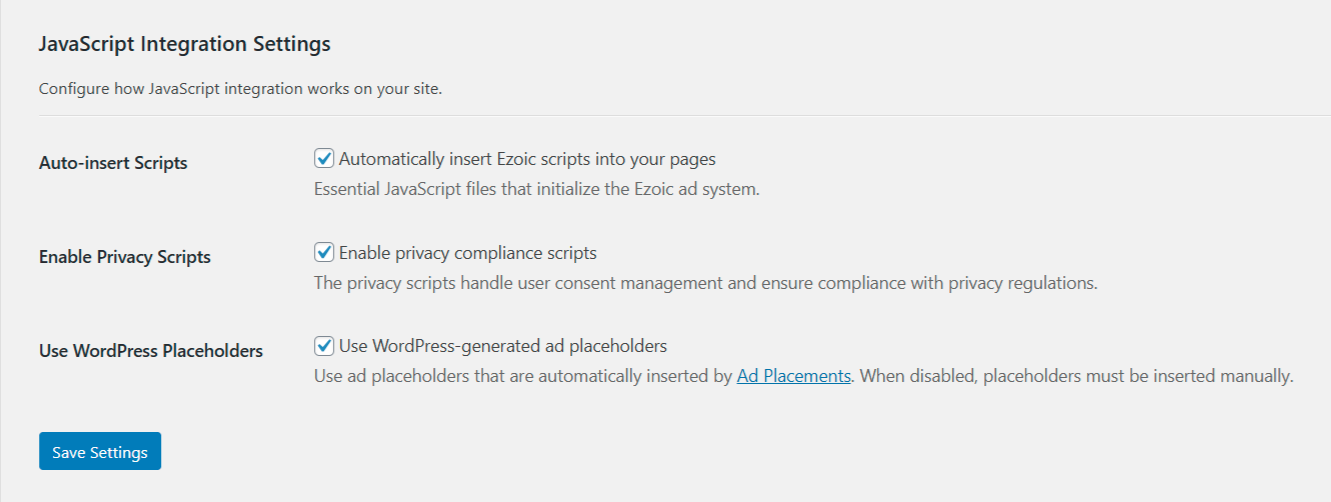
- In the "Integration" tab, please ensure all three boxes are checked for JavaScript Integration Settings.
-
Important: If you use third-party caching plugins (e.g., WP Rocket, W3 Total Cache), you must clear your cache for the scripts to appear on the front end.
Then check each of the below options:
Step 3: Configure and Adjust Placeholders
By default, the plugin creates WordPress-generated placeholders. You have the flexibility to adjust where these appear to match your site's design.
-
Adjusting Insertion Points: In the Ad Placements tab of the plugin, you can choose where placeholders are inserted (e.g., "Top of Page," "Under First Paragraph").
-
Note on Historical Data: If you have used Ezoic previously, our AI utilizes historical performance data for each placement. When adjusting insertion points, the system will continue to use this existing data to set dynamic bid floors and optimize revenue.
-
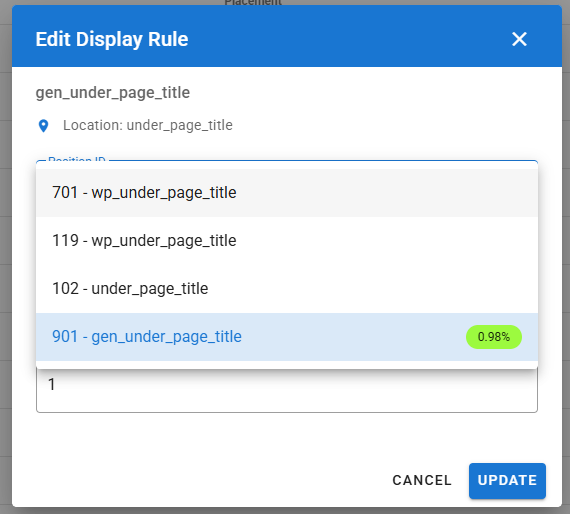
Advanced ID Matching: If you wish to retain specific Placeholder IDs from a previous setup:
-
Go to Settings > Ezoic > Ad Placements > Gear Icon > Advanced.
-
Check 'Enable Placement ID selection' and click Save Changes.
-
Return to Ad Placements and update the IDs for specific locations to match your highest-revenue units.
-
Step 4: Ads.txt Configuration
-
In WordPress, navigate to Settings > Ezoic > Ads.txt Setup.
-
Enable Automatic Ads.txt Management.
-
This ensures your site remains compliant with Google and Ezoic reseller requirements. For more details, see our Ads.txt Guide.
Step 5: Privacy Policy Update
-
Navigate to the Privacy section of your Ezoic Dashboard.
-
Ensure your site’s Privacy Policy reflects your relationship with Ezoic and includes the required disclosure links.
Step 6: Transitioning from Cloud Integration
If you are moving to the JavaScript plugin from a Name Server or Cloudflare integration, you must ensure your SSL is handled correctly.
-
Verify SSL: If Ezoic was managing your SSL, you must install a valid certificate (e.g., Let’s Encrypt or your host's SSL) at your origin server before disconnecting.
-
Remove Cloud Integration: Once the plugin is active and you have verified that your origin SSL is working:
-
For Name Servers: Repoint your name servers back to your host at your domain registrar.
-
For Cloudflare: Go to Ezoic Dashboard > Settings > Site Integration > Cloudflare and select "Remove Cloudflare."
-
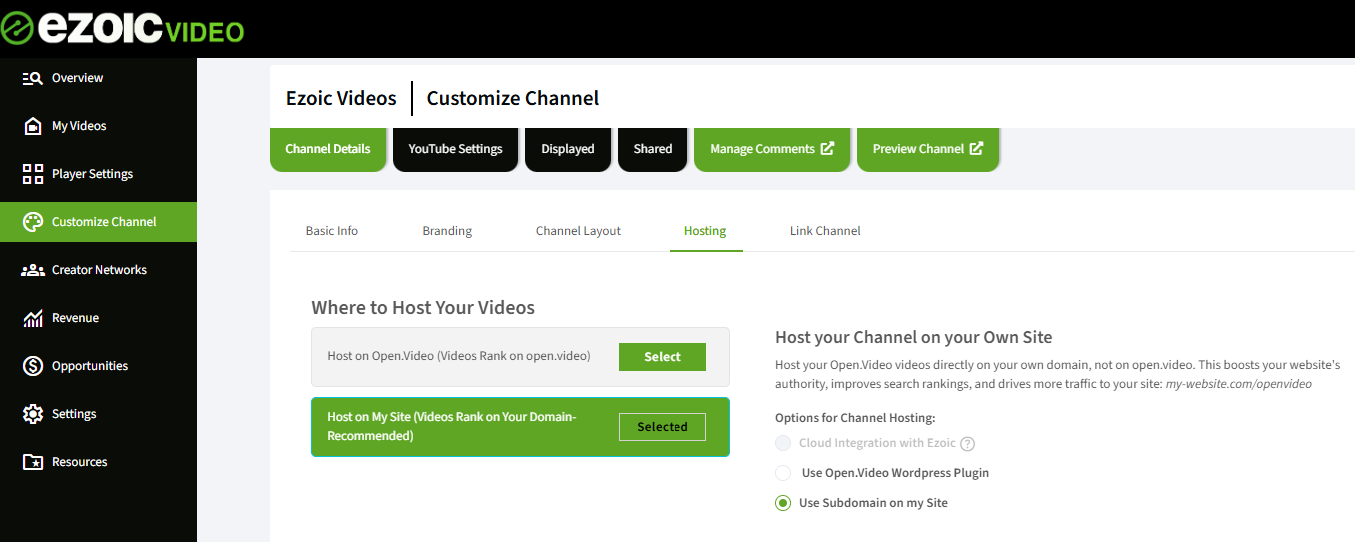
Step 7: Video Migration
If you utilize Ezoic Video, you should move your video hosting to your domain name for better SEO.
-
In the Open.Video plugin, ensure video integration is enabled. This creates a file path at
yourdomain.com/videos. -
Update your sitemap and submit it to Google Search Console.
-
Set up 301 redirects to point your old
open.videolinks to your new local video paths (e.g.,domain.com/openvideo/*tovideos.domain.com/openvideo/*). - Update the Ezoic Video dashboard to "Host on My Site" to "Use Open.Video Wordperss Plugin"
FAQs
How long does it take for the AI to optimize my new JavaScript setup?
We recommend allowing 14–21 days for the system to collect sufficient data. During this window, Ezoic’s AI tests different ad densities to find the configuration that maximizes your EPMV.
What happens to my old ad data if I change a placeholder's location?
Ezoic’s system is data-aware. If you adjust the insertion point within the plugin, the system continues to utilize your existing historical data to set bid floors. You do not lose the "learning" the AI has already achieved.
Why is it important to set up my origin SSL before removing Cloud integration?
When Cloud-integrated, Ezoic often manages your SSL. If you revert your Name Servers without having a valid SSL installed on your actual host, your site will show security warnings or fail to load.
Contact Information for Further Assistance
If you need further assistance with JS integration through the WordPress plugin, please log in via https://support.ezoic.com/ to make use of our dedicated resources for support. We're here to help!
